This article explain how to design a dynamic header and footer using Elementor Pro, which is really beneficial for your website.
The header and footer of your website have more to offer than just appearance.
They enable guests to negotiate, emphasize relationships, advance your branding, and enable search engines to grasp your website’s structure.
Dynamic headers and footers let any modifications you make appear all throughout your website.
This both saves time and lowers errors; hence everything seems to be constant.
The best thing is that using Elementor Pro lets you construct whole custom headers and footers without requiring you to learn to code.
I will show you the stages in this tutorial.
I shall also go over what to do if you do not have Elementor Pro.
Why Design a Dynamic Header and Footer?
A dynamic header and footer let you maintain constant branding across all of your pages.
- Your logos, links, and menus are automatically updated.
- They offer users content unique to them, including dashboards, carts, or login / logout links.
- They help customers have better experiences and improve navigation.
- They enable you to direct the appearance of various headers.
This feature is very important if you oversee websites or create ones for customers.
What’s Required
- Ensure WordPress is installed before beginning.
- You require both activated Elementor Pro and Elementor installed.
- You also have to pick a theme.
The lightweight Hello Theme is advised for optimum results as it is designed only for Elementor.
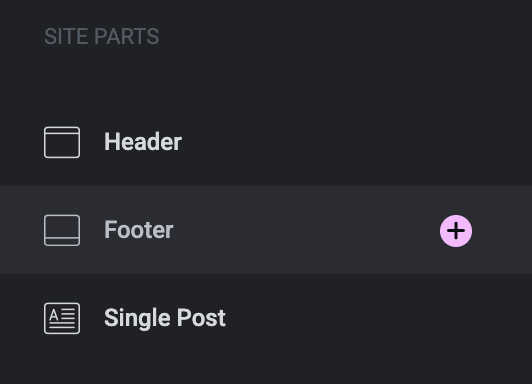
Part 1: How To Construct Dynamic Header
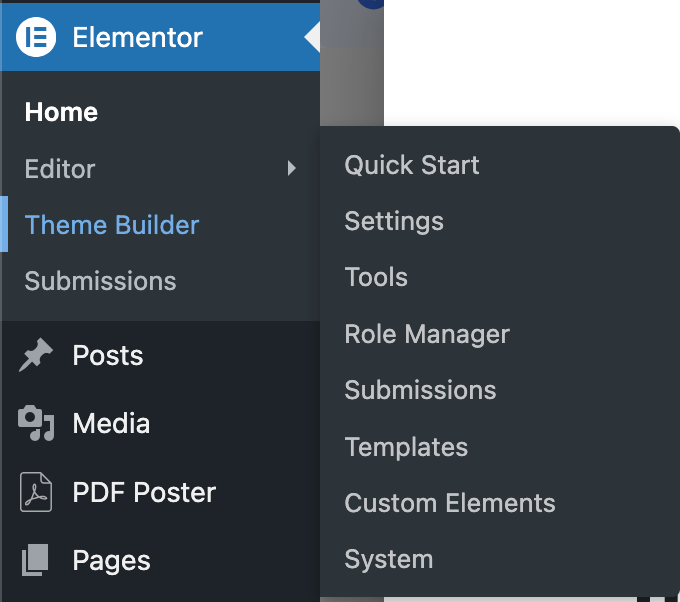
Step 1: Get Theme Builder Open
- Enter your WordPress dashboard.
- Select Theme Builder under Templates.
- Click on Header, then on Add New.
Opens the header mode Elementor editor.
Step 2: Either Choose a Template or Start From Scratch
- Starting from the ground up or utilizing a predetermined template.
- Starting fresh might be the better option if you want to control the design.
Step 3: Add Your Logo
Place the Site Logo widget in your header area.
It draws your logo from the Appearance, Customize, Site Identity section automatically.
Updating your logo in WordPress will have instant everywhere effect.
Step 4: Incorporate a Navigation Menu
- Bring the Nav Menu widget into the header.
- Choose the WordPress-created menu.
- Change the font and spacing.
- Pick your orientation.
Your header will automatically show any menu modifications made going forward.
Step 5: Incorporate Elements
You could provide:
- A search icon
- A call-to-action button
- A login or logout link
- A WooCommerce cart
Click on the widget, then select the Dynamic Tags icon and pick your data source to retrieve information.
This simplifies management of your website and keeps you from hardcoding data.
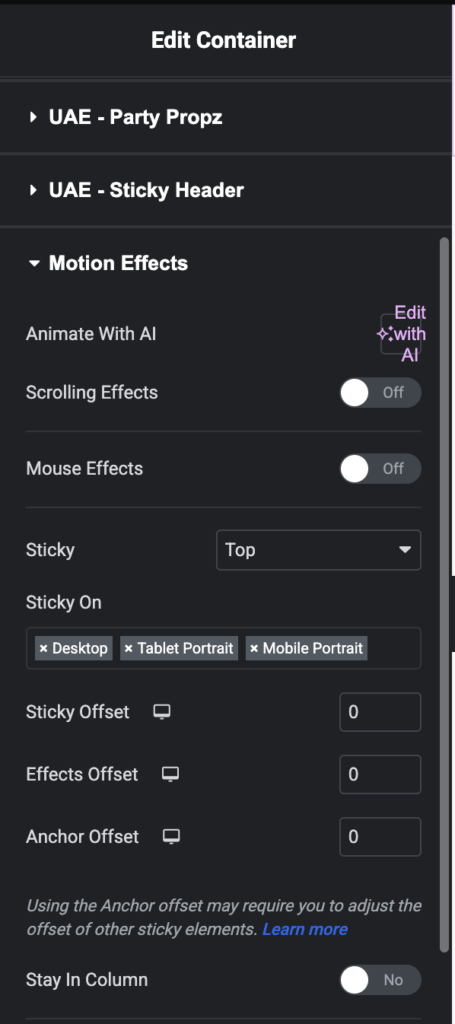
Step 6: Make It Sticky (Optional)
Users scroll to expose a sticky header.
Click on the header section to activate this, then navigate to:
Advanced → Motion Effects → Switch Sticky → Top
Check it on mobile and desktop to prevent design problems.
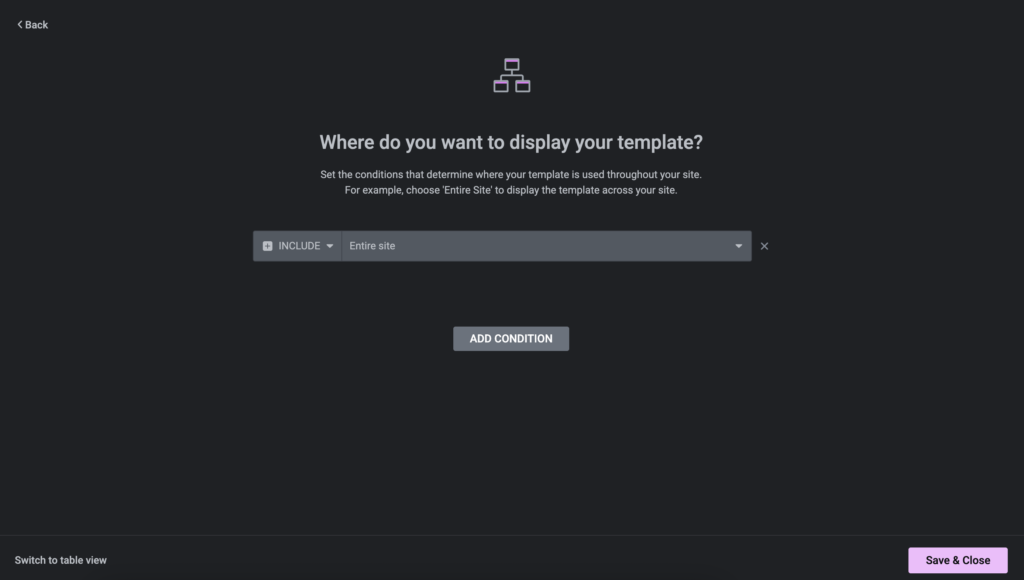
Step 7: Specify Show Conditions
- Click Publish.
- Decide where your header should go.
You can:
- Show it on the site
- Include pages
- Exclude landing pages
- Set several headers for different categories
This lets you arrange your surroundings.
Part 2: Creating a Footer
The procedure is nearly identical.
Step 1: Set a Footer Template
Go to Templates → Theme Builder → Add New → Footer.
Step 2: Construct the Footer Layout
Most professional footers include:
- Copyright text
- A company emblem
- Fast links
- Contact information
- Social media symbols
Normally appearing balanced and neat is a three- or four-column arrangement.
Step 3: Add Copyright Text
Include a Text Editor widget, then:
- Click on Dynamic Tags
- Choose Current Date
This prevents updating the year manually.
Display the year by means of formatting.
2026 for example. Copyright Your Company Name. All Rights Reserved.
It will next update annually automatically.
Step 4: Include a Footer Menu
Make a menu in the Menus area of Appearance.
Then choose it from the Nav Menu widget.
Step 5: Establish Display Conditions
- Publish
- Include: Entire Site
Your footer is live across everything.
Superior Customization Strategies
Header for Logged-In Users
- Duplicate your header.
- Add a dashboard button.
- Hide the login link.
- Set display conditions to display it solely to logged-in users.
For membership sites, this is ideal.
A header for:
- The homepage
- A basic header for landing pages
- A shop-specific header for eCommerce
Display criteria let one control this rather simply.
Optimize for Mobile
Always check:
- Sticky behavior
- Spacing
- Font size
- Menu arrangement
An improved header can affect user experience as well as SEO.
What If You Are Not Using Elementor Pro?
You still have alternatives.
Option 1
In their versions, Astra and Kadence provide integrated header and footer builders among other themes.
Option 2
Install the Elementor Header & Footer Builder plugin.
Custom header and footer creation without Elementor Pro is made possible this way.
Option 3
Certain themes provide header and footer editing using the Appearance Customize panel.
Features depend on your topic.
Common Errors to Stay Away From
- Avoid overusing sticky effects
- Disregarding mobile responsiveness
- Overloading the header with content
- Forgetting display conditions
- Ignoring site speed
Focus on performance, simplicity, and clarity.
Final Thoughts
Using Elementor Pro, designers have design flexibility by creating a header and footer.
You have charge over the design, structure, and visibility across your whole website instead of letting your topic restrict you.
Once you grasp Theme Builder and show conditions, you may design layouts for membership sites, online stores, corporate websites, and blogs.
Learning this ability will improve both your production and the final product if you frequently create websites for customers.
Need Help?
Creating an optimized header and footer calls for more than just dragging widgets.
Planning, structure, and performance awareness are all required.
With customized Elementor Pro development, dynamic header and footer creation, sophisticated Theme Builder modification, speed optimization, and SEO structuring, WP Consultants helps companies to build high-performing WordPress sites.
Our staff makes sure your design is conversion-driven, clear, and scalable whether you are launching a new website or renovating an already existing one.
Get going right away by contacting WP Consultants right now.